Factorio Train Signals Guide: Rail Signals, Chain Signals & Deadlocks
Factorio train signals are easiest to understand when you treat every signal as a block boundary and every junction as a reservation problem. Use chain signals before a conflict, regular rail signals after a clear exit, and test the longest train you will run before expanding the network. This guide explains how to place signals on straight rails, intersections, stations, bidirectional tracks and stackers without turning the main line into a waiting area.
Last updated: August 18, 2026. Written for Factorio 2.0 rail networks and Space Age planning.
Quick Answer: Where Should Factorio Train Signals Go?
Place a regular rail signal where a train may safely enter the next block and a chain signal before a junction, crossing or station throat that a train must not occupy unless its entire route is clear. Signals work in pairs with block boundaries, so the right placement depends on train length, direction and the conflicts beyond the next rail segment.
- Use chain signals before junctions, crossings and station entrances so trains wait outside the conflict block.
- Use regular rail signals after an intersection or station exit when the following block is safe to enter.
- Keep each signal on the correct side of the rail; a signal on the wrong side can make a route one-way or unreachable.
- For bidirectional single-track routes, signal both directions deliberately and test opposing trains before adding traffic.
- A signal count is never universal: divide the rail into blocks that fit the longest train and the amount of traffic the route must handle.
Signals Turn a Junction into Testable Blocks
The useful question is not how many signals a blueprint contains. Ask where a train may wait, which path it reserves, and whether a waiting train can block the route behind it. The diagram below shows the relationship between a conflict area, approach signals and clear exit blocks.
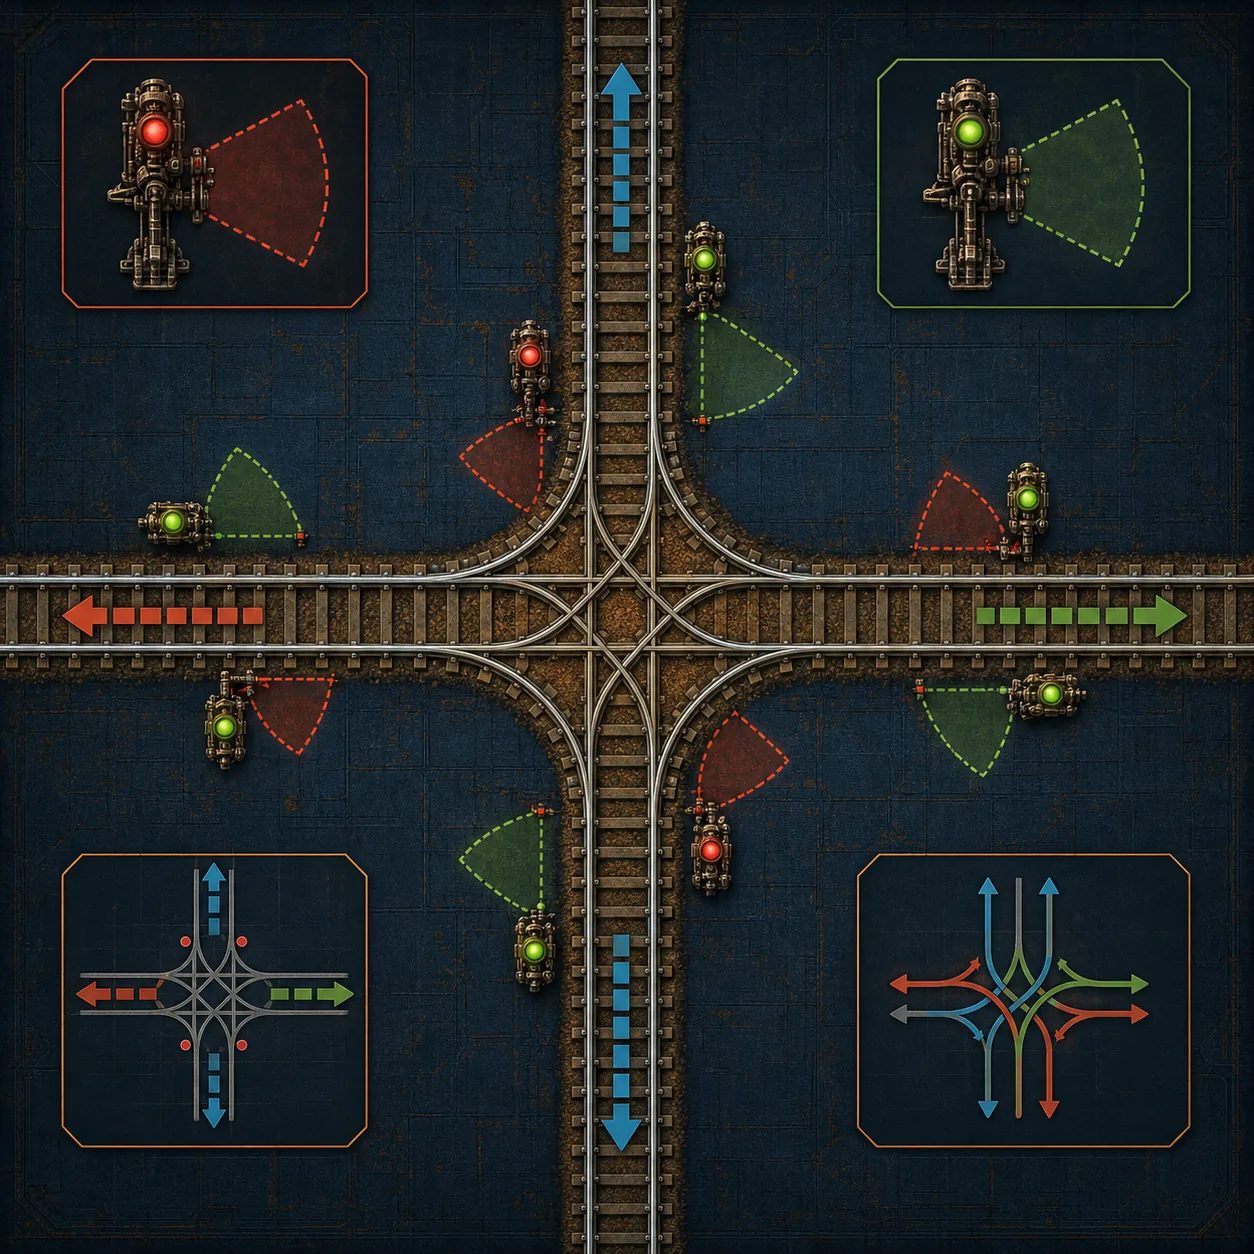
What Factorio Train Signals Actually Control
A signal divides rail into blocks and tells a train whether it may enter the next block. A train also reserves the path it needs, so a green-looking approach is not automatically safe if the route beyond it contains a station, crossing or another reserved segment.
| Signal situation | What the train needs to know | Practical placement |
|---|---|---|
| Open straight rail | The next block is empty and the train can continue | Use regular rail signals to create useful block lengths |
| Before a junction | The full path through the conflict area is available | Use a chain signal before the junction |
| After a junction | The train has cleared the conflict and may keep moving | Use a regular rail signal on the exit block |
| Before a station throat | A platform and exit path are available | Use a chain signal if the train must not stop inside the throat |
| Bidirectional single track | The opposing direction is clear and the route is reserved correctly | Signal each direction only after checking rail-side rules |
Rail Signal vs Chain Signal in Factorio
The simplest rule is chain before a conflict and regular signal after it. A chain signal looks ahead through connected blocks and prevents a train from entering when its next route cannot be completed. A regular rail signal controls the block immediately ahead and is useful once the train has cleared the conflict area.
Regular rail signal
Use it to divide safe open rail into blocks and to mark an exit that a train can occupy without blocking a junction. It is also useful after a station when the train has already left the shared throat.
Chain signal
Use it before a junction, crossing, station entrance or other conflict. It should hold the train outside the area when the next block, platform or exit is not available.
The common mistake
Putting a regular signal before a junction lets a train stop inside the conflict block. That can turn a small queue into a deadlock even when every signal appears to be working.
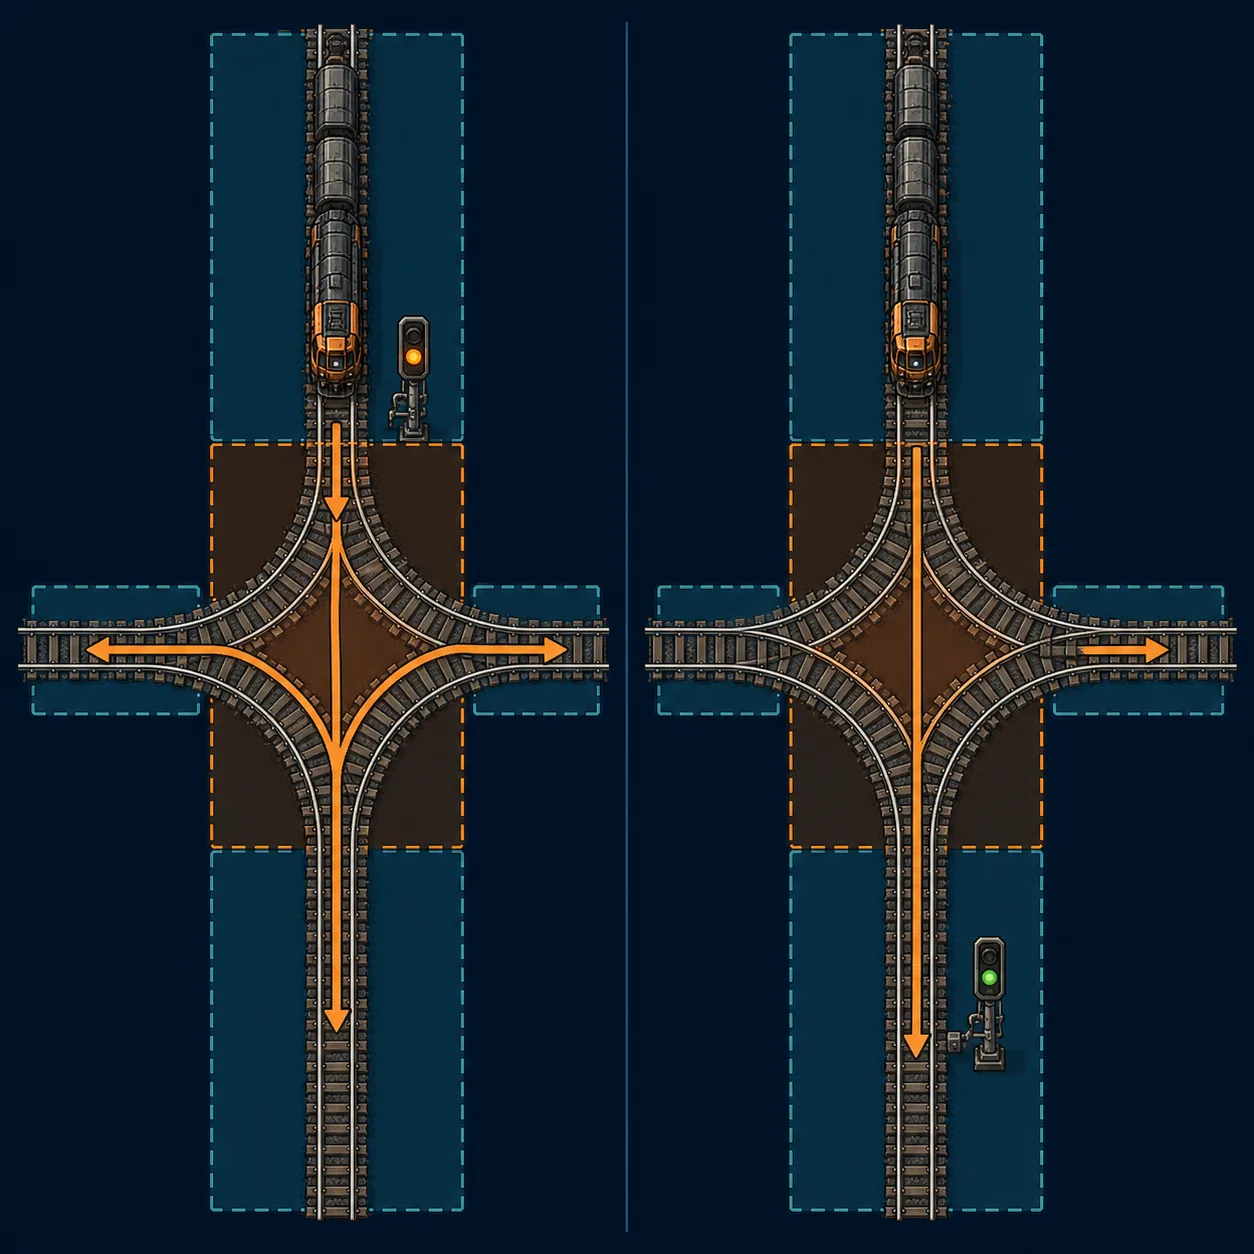
How to Place Factorio Train Signals Step by Step
Build the smallest working rail example first. Add one signal rule at a time, then send a train through the route before copying the pattern to a larger base.
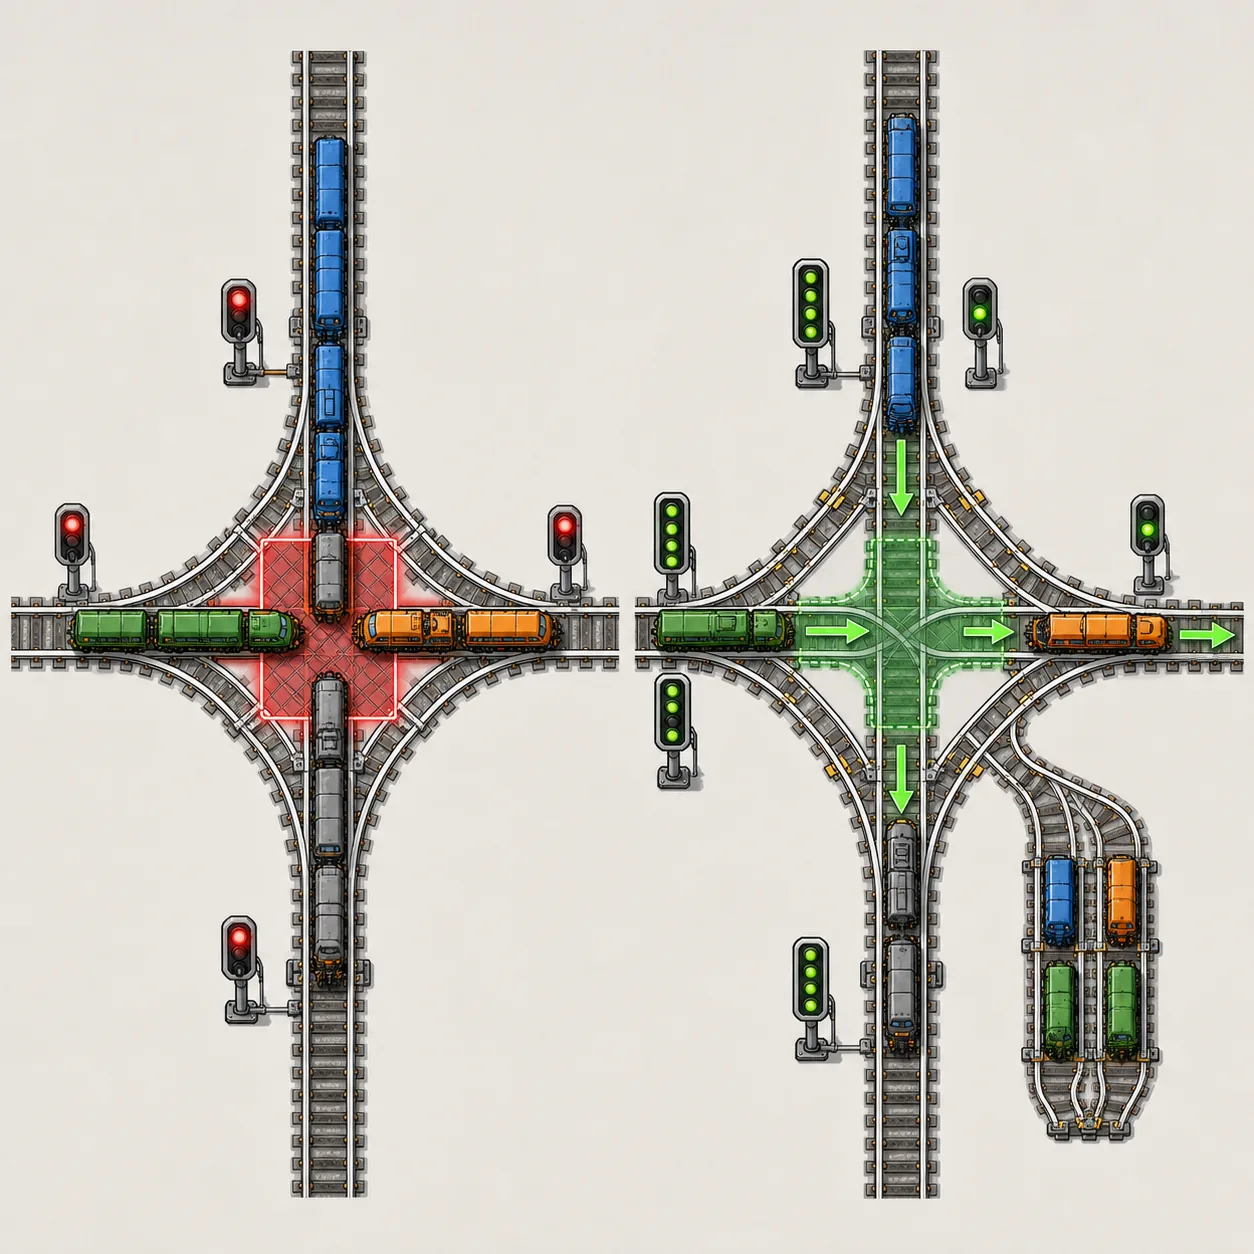
Choose the train standard
Decide whether the route uses 1-2, 1-4, 2-4 or another train length. The platform, stacker, waiting block and junction exits must all be long enough for the longest train.
Mark the conflict area
Highlight the crossing, junction, station throat or merge where two routes can interfere. This is the area a train should not occupy while waiting for a downstream path.
Place chain signals on approaches
Put chain signals before each approach to the conflict. Check the signal from the train's driving side and confirm that it sees the intended path rather than the wrong rail direction.
Place regular signals on exits
After the train has completely cleared the junction, add regular signals to divide the exits into usable blocks. Keep the exit block long enough for the train to clear the crossing.
Test one train, then two
Run one train in every intended direction, then run two trains through opposing approaches. If a train stops in the junction or a station queue reaches the main line, move the signal outward and test again.
Common Train Signal Layouts and Edge Cases
Different rail shapes create different failure modes. These patterns are useful starting points, but each one still needs a test with the actual train length and station limits used in your factory.
Four-way intersection
Protect all approaches with chain signals and use regular signals only after the crossing. Do not let a platform, stacker or short exit block overlap the central conflict area.
T-junction
Treat the merge as a conflict even when one branch is a low-traffic route. A chain signal before the merge prevents a train from reserving the branch and stopping in the shared path.
Bidirectional single track
Use paired signals only when both directions are intentionally supported. A one-sided signal can make the route one-way; a poorly sized block can let opposing trains reserve a deadlock.
Station and stacker
Keep the station entrance protected and move waiting trains into a stacker or buffer lane. A station queue on the main line is a capacity problem, not a reason to keep adding signals.
Factorio Train Signal Troubleshooting Checklist
When a train is stuck on red or cannot find a route, inspect the network in this order. Fix the first broken assumption before changing several signals at once.
| Symptom | Likely cause | First check |
|---|---|---|
| Train stops inside a junction | Regular signal is too close to the conflict | Replace the approach signal with a chain signal and move it outward |
| All signals look red | A downstream block, station or exit is reserved | Trace the intended route beyond the next block |
| No path to station | Signal is on the wrong rail side or a block is one-way | Remove the last signal and rebuild the direction pair |
| Queue blocks the main line | No stacker or buffer lane | Move the waiting signal and station entry off the through route |
| Two trains face each other forever | Bidirectional blocks are too long or reserved inconsistently | Test one block with opposing trains and check both directions |
| Deadlock appears only when busy | The blueprint was not tested with full trains | Use the longest train, full station limits and two or more routes |
A Short Rail Signal Test Plan Before Scaling
A signal layout is ready to copy only after it survives the same traffic pattern that will exist in the real factory.
Empty and loaded trains
Test both directions with empty and loaded trains. Longer braking and station timing can expose a block that looked safe with a single test train.
Longest train
Use the exact longest train that can enter the route. If its tail remains in the junction or station throat, the signal boundary is too short.
Two conflicting paths
Send trains through crossing paths at the same time. They should wait before the conflict, not inside it, and they should recover once the exit block opens.
Expansion and queue test
Add the next station or branch and fill the stacker. A reusable blueprint should keep waiting trains off the main line when traffic grows.
Need to size the train route behind the signals?
Use the Factorio train calculator to estimate payload, cycle time and active trains, then return to this guide to check whether stations, stackers and signals can handle the route.
Factorio Train Signals FAQ
How do I place train signals in Factorio?
Place chain signals before junctions, crossings and station throats, then place regular rail signals after the train has cleared the conflict. Always check the signal from the train's driving side and test the longest train on the route.
What is the difference between a rail signal and a chain signal?
A regular rail signal controls entry into the next block. A chain signal looks farther along the route and keeps a train outside when the next block, platform or exit is unavailable. That makes chain signals useful before conflicts.
How many train signals do I need?
There is no universal number. Add signals where you want block boundaries, make conflict approaches chain-signaled, keep exit blocks long enough for the train, and use traffic tests to decide whether more blocks are useful.
Why are my Factorio train signals stuck on red?
Trace the route beyond the next block. A station limit, reserved exit, wrong-side signal, one-way block or train waiting in a conflict can keep the route unavailable even when the nearby rail looks empty.
How should I signal a bidirectional train track?
Treat each direction as a deliberate route and use paired signals only where both directions are supported. Keep the shared block long enough for the longest train, then test two opposing trains before adding more traffic.
Do train blueprint books need chain signals?
Any blueprint with crossings, merges or station throats should document its signal rule. A chain signal before the conflict and a regular signal after the exit is a useful default, but the book still needs testing with your train length and station layout.
Sources and Further Reading
Use these Factorio Wiki references to verify rail blocks, signal behavior and railway terminology while testing your own layouts.