Factorio Belt Balancer: Choose the Right Blueprint
A Factorio belt balancer blueprint is useful when belts feed a train station, smelter block, main bus branch or mining patch unevenly. The important question is not only "which balancer fits this belt count?" but whether the design is lane-balanced, throughput-unlimited and actually needed for the bottleneck you are fixing.
Last updated: September 12, 2026. Covers vanilla, Factorio 2.0 and Space Age belt throughput.
Quick Answer: Which Belt Balancer Should You Use?
Match the balancer to the number of full belts that must be shared evenly. Use powers of two when possible, loop or cap unused lines carefully for 3-belt cases, and reserve large balancers for places where uneven draw really causes starvation.
- Use a 2-to-2 balancer for two equal belts, small smelter outputs or simple bus joins.
- Use a 4-to-4 balancer for common train unloading, four-lane bus sections and mid-game ore patches.
- Use an 8-to-8 balancer only when eight belts can actually stay saturated; otherwise it adds footprint without solving the constraint.
- Use a 3-to-1 or 3-to-3 balancer when three belts must compress or redistribute, but check whether one belt of output is the real limit.
- Do not balance mixed-item belts unless you understand lane behavior; a splitter balances lanes, not item types.
A Balancer Is a Splitter Network, Not Magic Throughput
Splitters divide and merge belts in equal shares. A blueprint can distribute input evenly, but it cannot create more belt capacity than the input belts, output belts and internal splitter paths allow. That is why a compact 4-to-4 balancer may behave differently from a throughput-unlimited version when one output backs up.
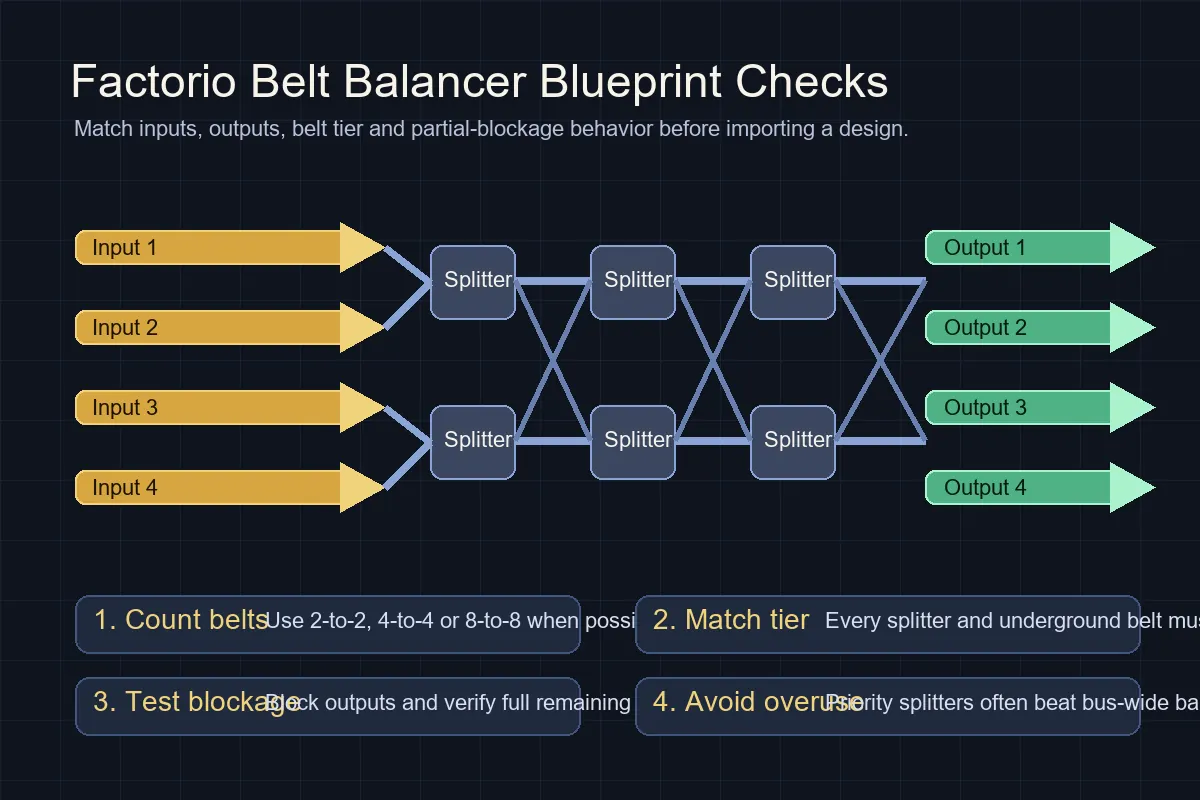
Belt Balancer Blueprint Selection Table
Use this table as the first pass before importing a blueprint book. It keeps the search intent practical: choose the smallest balancer that solves the actual distribution problem.
| Need | Recommended Blueprint | Best Use | Watch Out For |
|---|---|---|---|
| One belt with uneven lanes | Lane balancer | Inserter-fed belts, side-loaded belts, mixed lane output | Lane balance is different from belt-to-belt balancing. |
| 2 full belts in and 2 out | 2-to-2 balancer | Starter bus joins, paired smelter columns, two train wagon outputs | Use the same splitter tier as the belt tier. |
| 3 belts into 1 belt | 3-to-1 compressor or priority merge | Small mining patch cleanup or feeding one constrained recipe block | One output belt caps total throughput no matter how good the balancer is. |
| 3 belts in and 3 out | 3-to-3 balancer or 4-to-4 with a looped unused line | Odd belt counts on a main bus or mining patch | Loopbacks need space and can create confusing visual flow. |
| 4 belts in and 4 out | 4-to-4 throughput-unlimited balancer | Train unloading, four-lane bus, ore patches, plate blocks | Basic 4-to-4 designs can become limited when only some outputs draw. |
| 8 belts in and 8 out | 8-to-8 throughput-unlimited balancer | High-throughput stations and megabase buses | Large footprint; use only where all belts can stay meaningful. |
| Space Age turbo belts | Same topology with matching turbo splitters | Late-game high-rate belts and platform-adjacent logistics | A slow splitter or underground belt becomes the bottleneck. |
Throughput-Limited vs Throughput-Unlimited Balancers
The most important quality of a balancer blueprint is how it behaves when some inputs or outputs are missing, blocked or partially consumed. A design can look balanced in a screenshot and still lose capacity in a real factory.
Input balanced
An input-balanced design draws evenly from every input belt or lane. It is useful when mining patches or train wagons must empty at similar rates.
Output balanced
An output-balanced design distributes material evenly to each output belt or lane. It is useful before parallel smelters, assemblers or bus branches.
Throughput unlimited
A throughput-unlimited balancer can still pass full available throughput when arbitrary inputs or outputs are used. These designs are usually larger because they need extra splitter paths.
Universal balancer
A universal balancer handles many input-output combinations with built-in loopbacks, but it can still be limited by internal belt capacity if the blueprint is not designed carefully.
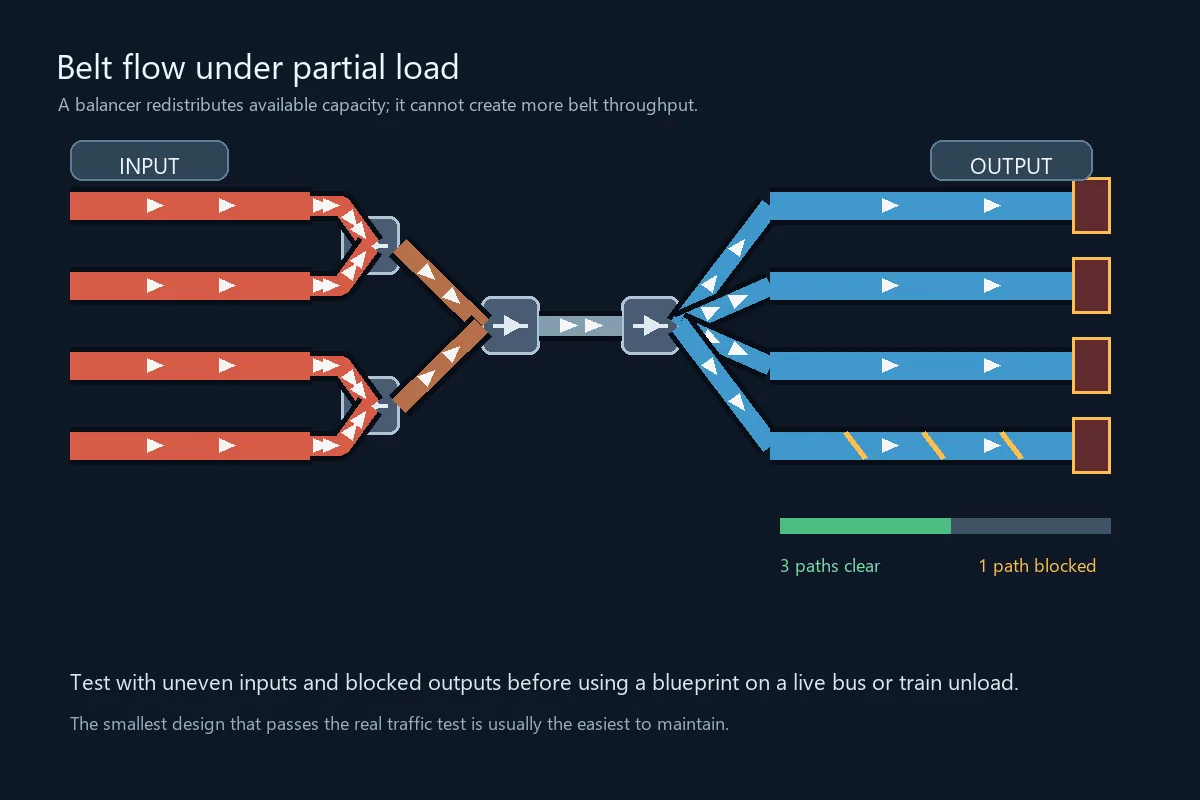
Belt Balancer Traffic Test Checklist
A blueprint should be tested with the same uneven demand it will see in the factory. Use a small sandbox setup, feed controlled inputs, block one output at a time and compare the result with the belt rate from the calculator. This exposes hidden splitter, lane and belt-tier limits before the design becomes part of a larger bus or train station.
Confirm belt tier
Use the intended yellow, red, blue or turbo belt throughout the test. A fast outer line cannot compensate for a slower underground belt or splitter inside the balancer.
Test uneven inputs
Feed one side or one input first, then add the remaining belts. The design should use available capacity without starving a valid output path.
Block an output
Stop one output and observe the others. A throughput-unlimited layout should keep moving the available input instead of creating an avoidable internal jam.
Check lane behavior
Watch both lanes after side loading, merging or train unloading. A belt-to-belt balancer may still leave a single belt lane unbalanced.
Record the bottleneck
If the test fails, note whether the limit is input, output, splitter, underground belt or downstream demand. Fix that constraint before choosing a larger blueprint.
How to Choose and Place a Factorio Belt Balancer
Measure the real belt rate
Start with the calculator output or in-game production rate. Yellow, red, blue and turbo belts carry different maximum item rates, so a balancer sized for four yellow belts may not make sense after upgrades.
Identify the failure mode
A backed-up bus, uneven train unloading, one starved smelter row and a mixed-lane sushi belt are different problems. Choose belt balancing, lane balancing, priority splitting or a simple merge based on the failure.
Pick the smallest matching blueprint
Use 2-to-2, 4-to-4 and 8-to-8 when possible. For 3-belt cases, decide whether you need a true 3-to-3 distribution, a 3-to-1 compressor or a priority merge.
Match every splitter and underground belt tier
A slower splitter inside an otherwise fast belt layout silently throttles the whole design. This matters more after red, blue and Space Age turbo belt upgrades.
Test partial blockage
Block one or two outputs and watch whether the remaining outputs stay saturated. This is the quickest way to catch designs that only work in ideal full-load conditions.
When You Should Not Use a Belt Balancer
Balancers are useful, but they are not free. They take space, add splitter cost, reduce readability and can hide the true bottleneck. Many modern bus designs use priority splitters instead of balancing every branch.
| Situation | Better Choice | Reason |
|---|---|---|
| Main bus tap-off | Priority splitter | You usually want the bus to keep moving downstream while the branch takes only what it needs. |
| One recipe block is short on input | Calculate machine count and belt demand | The bottleneck may be production rate, not distribution. |
| Mixed item belt | Filter splitter or dedicated lanes | A normal balancer does not sort item types. |
| Short temporary starter base | Simple merge/split | A full balancer can waste early space and materials. |
| Train loading with strict wagon equality | Chest balancing plus belt balancing | Belts alone may not keep every wagon chest set evenly loaded. |
Common Belt Balancer Examples
3-to-1 belt balancer
Use it only when three partial belts must feed one full output belt. If the three inputs together exceed one belt, the output belt is the cap and excess items will back up.
4-to-4 train unload balancer
A four-wagon ore station often benefits from a 4-to-4 throughput-unlimited balancer after the unloading chests, especially when downstream smelter rows draw unevenly.
8-to-8 megabase balancer
Use large balancers near high-throughput train stacks, ore processing or plate buses. Keep them out of tiny starter blocks where they make maintenance harder.
Lane balancer after side loading
Side loading and inserter placement can put most items on one lane. Use a lane balancer before machines that consume from both lanes unevenly.
Need to size the belts before choosing a balancer?
Use the Factorio calculator to estimate output, belt count and machine count before choosing a balancer.
Factorio Belt Balancer FAQ
What is the best Factorio belt balancer blueprint?
Choose the smallest throughput-safe design matching the input and output count. For most factories, use 2-to-2, 4-to-4 or 8-to-8; use lane balancers only for uneven lanes.
How does a 3 to 1 belt balancer work in Factorio?
A 3-to-1 balancer merges three inputs into one output. It can even out partial belts, but one output belt remains the throughput cap.
Do I need a balancer on every main bus branch?
Usually no. Many bus branches work better with priority splitters so the branch receives items while the bus keeps a preferred downstream direction. Use a balancer when uneven draw starves parallel lines.
What is the difference between belt balance and lane balance?
Belt balance distributes material across belts; lane balance distributes material across one belt's two lanes. A blueprint may do one, both or neither.
Does Space Age change belt balancer blueprints?
Space Age keeps the same splitter logic but adds turbo belts. Match every splitter and underground segment to the intended belt tier.
What is a throughput-unlimited belt balancer in Factorio?
A throughput-unlimited balancer preserves available belt rate across supported input and output combinations when lines are idle or blocked. Test the actual blueprint; its label is not proof.
Sources and Further Reading
References for splitter and belt mechanics.